|
|||||||


| Register | Readers Rides | Gallery | FAQ | Members List | Social Groups | Calendar | Search | Today's Posts | Mark Forums Read |
 |
|
|
Thread Tools | Display Modes |
|
|
|
|||||||
| Register | Readers Rides | Gallery | FAQ | Members List | Social Groups | Calendar | Search | Today's Posts | Mark Forums Read |
|
|
|
Thread Tools | Display Modes |
 19-01-2011, 02:00 AM
|
#81 |
|
Senior Member
 
Join Date: Sep 2004
Location: Logan prefecture
Car: Touge monster
Posts: 7,585
|
I really like the new modified stock front end.
 I wonder if you will get a bit of ram air effect now? |

|

|
|
19-01-2011, 09:13 AM
|
#82 |
|
Administrator

Join Date: Mar 2002
Location: melb.vic.au
Car: AZ-1, Astina Hardtop Turbo, BJ Protege, Beetle
Posts: 16,525
|
Do like
__________________
jdmparts.rupewrecht.com Sourcing your not-quite-overnight parts from Japan WRECHT--|--SLOWTEGE--|--BEETLE--|--SUBSTITUTE--|--AZ-1 |
|
|
|
|
19-01-2011, 02:02 PM
|
#83 |
|
Moderator

Join Date: Oct 2005
Location: Ipswich, Queensland
Car: 2002 Mazda Astina SP20 2006 Mazda 6 GY Wagon
Posts: 9,769
|
As i have said before, it looks wicked, a real eye catcher now from the front
 How much did the front bar & lip cost you to be painted? If you dont wanna tell on here, let us know via PM or email/msn etc, you have my details 
__________________
 ![[URL="http://www.astinagt.com/forums/vbpicgallery.php?do=view&g=590"]](image.php?s=b8ab3f8148aeb6237fd70c0f169d1949&u=1216&type=sigpic&dateline=1355019352) |
|
|
|
|
19-01-2011, 02:56 PM
|
#84 | |||||
|
SP20 Member!

|
Quote:
Quote:
Quote:
Quote:
Can't wait to get the Matt V headlights in and have some night shots taken  I was talking to Matt the other day and he said they will plug straight into the stock looms I was talking to Matt the other day and he said they will plug straight into the stock looms Quote:
 ) the OEM primer and re-primed it. ) the OEM primer and re-primed it.
__________________
 Exhaust: Autoexe headers; Custom midpipe; Racing Beat catback Engine: AWR mounts; Twiggy cams; Custom CAI; RR Racing UDP; Mishimoto rad EMS: Microtech LT-10; J&S Safeguard; Gearbox: MSP LSD; Fidanza flywheel; 5th gear Rims/Suspension: MX-5 rims; Tokico Illuminas; Eibach Pro-kit; Progress RSB; AutoExe STB Exterior: MSP front lip & rear spoiler; Matt V headlights; AutoExe grill; EDM tails Interior: JVC AVX-77; Autometer gauges; DaveBs; B&M shifter Projects to come: Engine rebuild Last edited by Orion; 19-01-2011 at 03:07 PM. |
|||||
|
|
|
|
19-01-2011, 03:59 PM
|
#85 |
|
AstinaGT Regular
Join Date: Mar 2010
Location: Melb
Car: SP20
Posts: 394
|
That lip is sweeeeeet!
|
|
|
|
|
02-04-2011, 01:38 AM
|
#86 |
|
SP20 Member!
|
Fuel pressure sensor in
So, I have been knocking off some minor projects that have been sitting on the shelf - for a while
") One of these was placing my fuel pressure sensor in the fuel rail. The gauge was already mounted and powered, and the sensor plug was already positioned in the engine bay. What I needed was for some way to place the pressure sensor in the fuel system with little or no modification. Then I stumbled upon this product: http://www.dynotunenitrous.com/store...?idproduct=245 It basically acts as a spacer between the fuel rail and the pressure regulator with a port out the side for a sensor. I got the dimensions off the company and they were pretty close to the SP20 application. The bits where the fuel travels through are perfectly fine for an SP20, but I had to enlarge the mounting holes a bit to bolt it to the fuel rail. Applying it to my fuel pressure regulator looks like this: 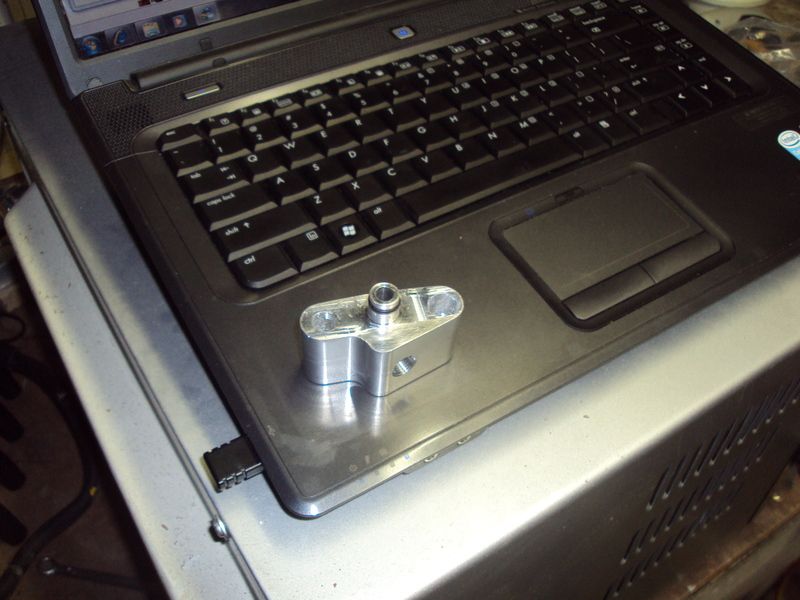 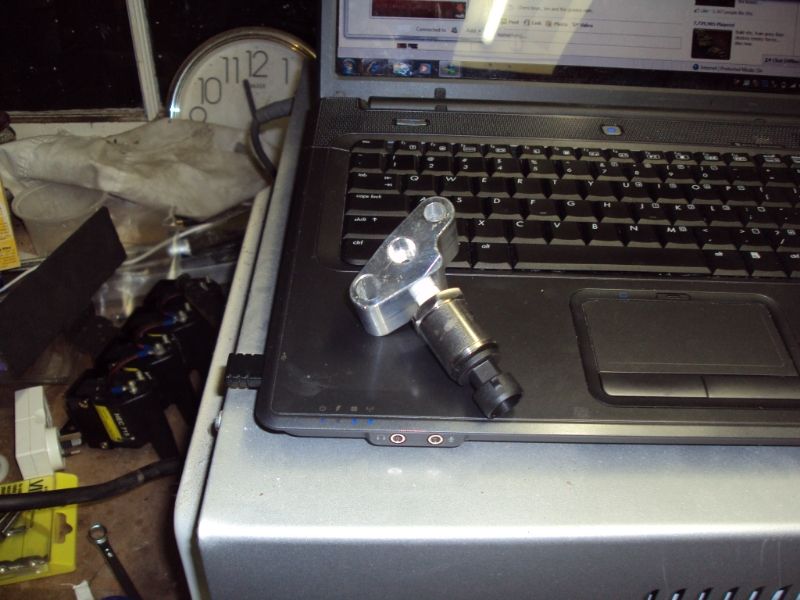 I don't have a great shot of it on the engine but you might be able to spot the flash of silver in a later photo All-in-all, a fairly simple and easy install once some minor modification has been done
__________________
Exhaust: Autoexe headers; Custom midpipe; Racing Beat catback Engine: AWR mounts; Twiggy cams; Custom CAI; RR Racing UDP; Mishimoto rad EMS: Microtech LT-10; J&S Safeguard; Gearbox: MSP LSD; Fidanza flywheel; 5th gear Rims/Suspension: MX-5 rims; Tokico Illuminas; Eibach Pro-kit; Progress RSB; AutoExe STB Exterior: MSP front lip & rear spoiler; Matt V headlights; AutoExe grill; EDM tails Interior: JVC AVX-77; Autometer gauges; DaveBs; B&M shifter Projects to come: Engine rebuild Last edited by Orion; 10-08-2014 at 01:53 PM. |
|
|
|
|
02-04-2011, 02:07 AM
|
#87 |
|
SP20 Member!
|
Coil pack relocation
Another one of these projects that has been sitting around. I had a bracket that I had made up to mount my coils on that sat over the intake manifold. This eventually broke through the mounting points on the IM (as it is cast aluminium) mostly due to the vibration of the engine.
Then I fired a coil and a bolt got welded in on the bracket. So what I had was a bracket I couldn't use and had to improvise with the coil packs The "before" shot: 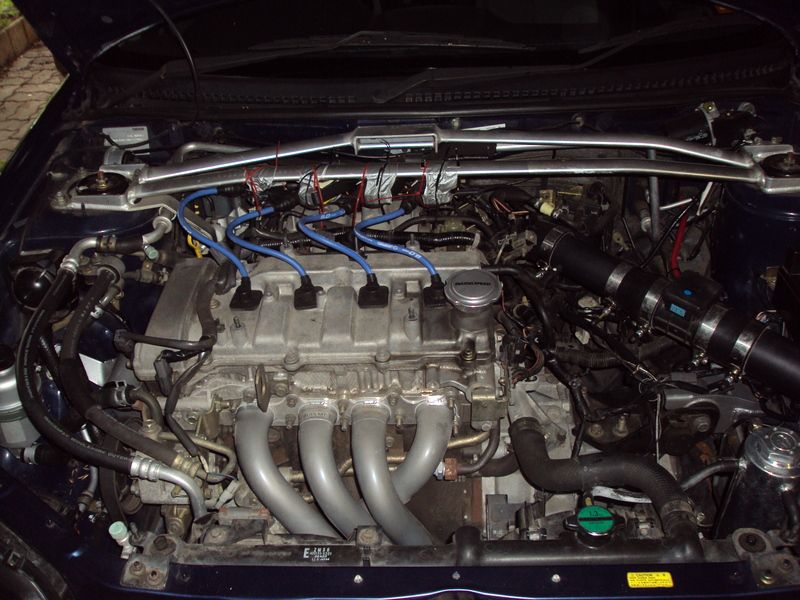 There was a relay sitting under my fuse box that only allowed power to the coils when the engine was "ON", not at "ACC" or "OFF". While this may be viewed as over-cautious I liked the fact that coils are switched off if the engine is not running. So I decided to retain this feature but wanted the relay moved out. I built a small bracket ans attached two relays to it and placed them near the power distribution block. I was able to hook everything up but still needed a signal for the relay to tell it when the power was "ON". Using speaker clips I made this little gadget that provides a discrete outlet for "ON" or ignition in the engine bay. 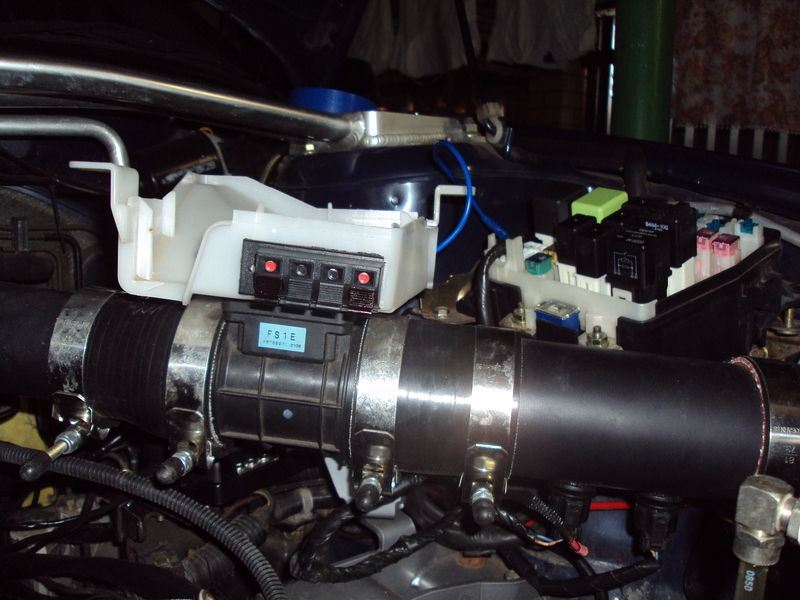 Two of the outputs will be used for the relays and the other two can be used for whatever I need  I built a new bracket for the coils a while back and had them on the engine for about a month as a bit of a field test while I waited to get the new leads made up. Everything worked fine so a couple of weeks ago I mounted everything and here is the end result: 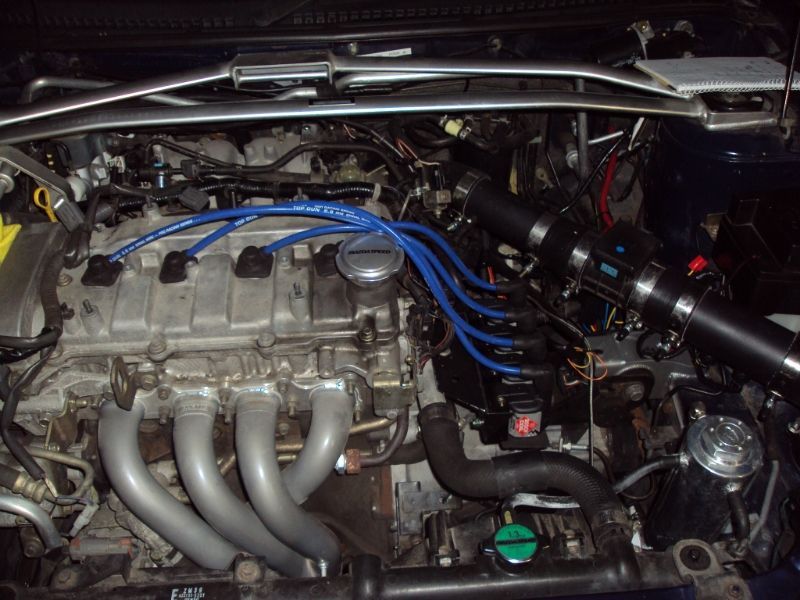 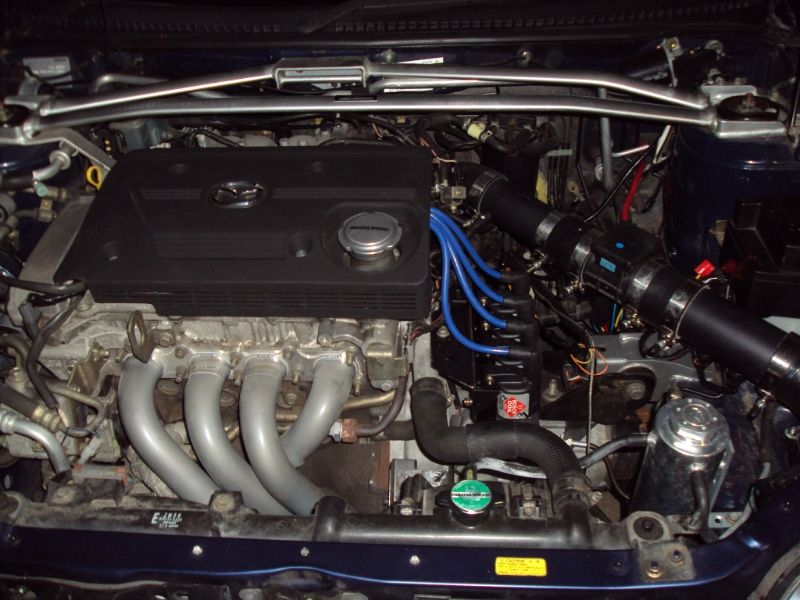 Makes for a much nicer engine bay Also, now that my strut brace is all nice and clean I can pull it off and mod it to mount up my vac block. Yes, you guessed it - another project that has been sitting on the shelf!
__________________
Exhaust: Autoexe headers; Custom midpipe; Racing Beat catback Engine: AWR mounts; Twiggy cams; Custom CAI; RR Racing UDP; Mishimoto rad EMS: Microtech LT-10; J&S Safeguard; Gearbox: MSP LSD; Fidanza flywheel; 5th gear Rims/Suspension: MX-5 rims; Tokico Illuminas; Eibach Pro-kit; Progress RSB; AutoExe STB Exterior: MSP front lip & rear spoiler; Matt V headlights; AutoExe grill; EDM tails Interior: JVC AVX-77; Autometer gauges; DaveBs; B&M shifter Projects to come: Engine rebuild Last edited by Orion; 10-08-2014 at 02:03 PM. |
|
|
|
|
05-04-2011, 11:00 AM
|
#88 | |
|
SP20 Member!
|
Edited the fifth post on the front page of the thread
Engine build Quote:
__________________
Exhaust: Autoexe headers; Custom midpipe; Racing Beat catback Engine: AWR mounts; Twiggy cams; Custom CAI; RR Racing UDP; Mishimoto rad EMS: Microtech LT-10; J&S Safeguard; Gearbox: MSP LSD; Fidanza flywheel; 5th gear Rims/Suspension: MX-5 rims; Tokico Illuminas; Eibach Pro-kit; Progress RSB; AutoExe STB Exterior: MSP front lip & rear spoiler; Matt V headlights; AutoExe grill; EDM tails Interior: JVC AVX-77; Autometer gauges; DaveBs; B&M shifter Projects to come: Engine rebuild |
|
|
|
|
|
05-04-2011, 11:06 AM
|
#89 |
|
Senior Member
Join Date: Jun 2008
Location: Auchenflower, Brisbane
Car: Blue SP20
Posts: 2,782
|
What High compression stuff did you get? What sort of static compression?
EDIT: The oil system is the one i thought it was.
__________________
 |
|
|
|
|
05-04-2011, 11:39 AM
|
#90 | |
|
SP20 Member!
|
Quote:
Wiseco 11.0:1 (static) compression pistons - 0.5mm overbore - raised wrist pin (to match long rods) - deep valve recesses for high-lift cams
__________________
Exhaust: Autoexe headers; Custom midpipe; Racing Beat catback Engine: AWR mounts; Twiggy cams; Custom CAI; RR Racing UDP; Mishimoto rad EMS: Microtech LT-10; J&S Safeguard; Gearbox: MSP LSD; Fidanza flywheel; 5th gear Rims/Suspension: MX-5 rims; Tokico Illuminas; Eibach Pro-kit; Progress RSB; AutoExe STB Exterior: MSP front lip & rear spoiler; Matt V headlights; AutoExe grill; EDM tails Interior: JVC AVX-77; Autometer gauges; DaveBs; B&M shifter Projects to come: Engine rebuild |
|
|
|
|
|
05-04-2011, 09:54 PM
|
#91 |
|
Senior Member
Join Date: Jun 2008
Location: Auchenflower, Brisbane
Car: Blue SP20
Posts: 2,782
|
So custom pistons from Wiseco? K1 rods the same ones that tri point sell/use?
What rpm are you aiming for? Using a calculator i got from Mazdas247 your new rev limit can prolly be about 7400 rpm. Thicker rist pin + rod means you should be able to go a lil higher i guess. Whats the weight of the pistons and rods gonna be like? Shame none of the FS stuff will work on my engine 
__________________
Last edited by Ice88; 05-04-2011 at 10:10 PM. |
|
|
|
|
29-06-2011, 08:48 PM
|
#92 |
|
SP20 Member!
|
New radiator ready!
So, life has been hectic of late with work (and other things - those in the know, know
) but I have been trying to move some projects along. I was originally going to do a big radiator install but I have decided to break it into two stages.Firstly, I will install the new radiator with aftermarket fans, new hoses and thermostat. Then I will tap into the power and ground wires of the radiator fans in order to install a fan controller (but more on that when it happens). So, here is Stage One. Mishimoto two-pass aluminium radiator, Mishimoto fans which I have attached stock fan plugs to. I am still waiting for the coolant hoses, so it will be a couple of weeks before I can install this Here are the some photos. Firstly, the whole setup: Imageshack  In this pic you can see the stock connectors and also an auxiliary coolant temp sensor (again, more on the purpose of this later ):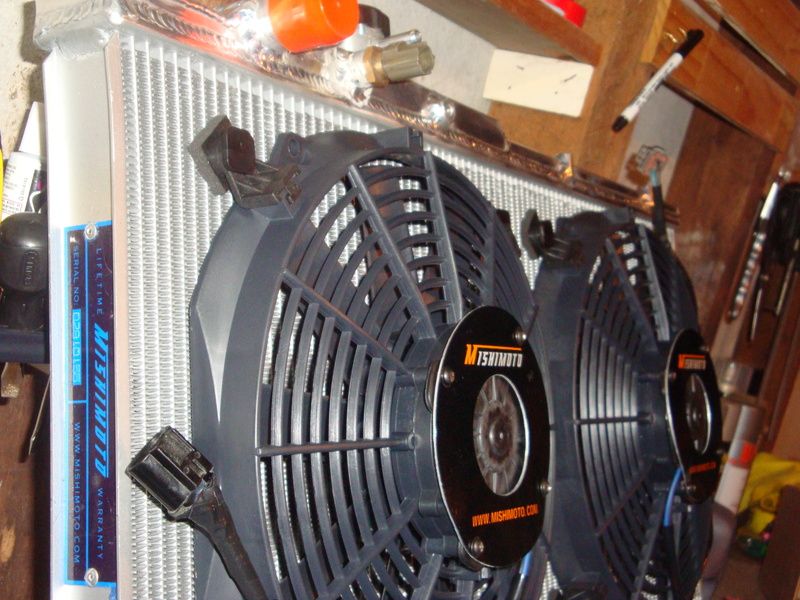 I hope to update you all soon with the install!
__________________
Exhaust: Autoexe headers; Custom midpipe; Racing Beat catback Engine: AWR mounts; Twiggy cams; Custom CAI; RR Racing UDP; Mishimoto rad EMS: Microtech LT-10; J&S Safeguard; Gearbox: MSP LSD; Fidanza flywheel; 5th gear Rims/Suspension: MX-5 rims; Tokico Illuminas; Eibach Pro-kit; Progress RSB; AutoExe STB Exterior: MSP front lip & rear spoiler; Matt V headlights; AutoExe grill; EDM tails Interior: JVC AVX-77; Autometer gauges; DaveBs; B&M shifter Projects to come: Engine rebuild Last edited by Orion; 10-08-2014 at 02:06 PM. |
|
|
|
|
29-06-2011, 10:59 PM
|
#93 |
|
Senior Member

|
What are the benefits of this?? Just curious not dissing
__________________
 Rupe - keeping my pockets empty since 2010 lol
|
|
|
|
|
30-06-2011, 10:39 AM
|
#94 | |
|
SP20 Member!
|
Quote:
I also know the plastic endtanks on the stock radiator sometimes crack, so going to an all aluminium radiator will prevent this potential failure. Also, with my high-comp engine build things will be running hotter than with a stock engine, so it is a bit of future-proofing as well
__________________
Exhaust: Autoexe headers; Custom midpipe; Racing Beat catback Engine: AWR mounts; Twiggy cams; Custom CAI; RR Racing UDP; Mishimoto rad EMS: Microtech LT-10; J&S Safeguard; Gearbox: MSP LSD; Fidanza flywheel; 5th gear Rims/Suspension: MX-5 rims; Tokico Illuminas; Eibach Pro-kit; Progress RSB; AutoExe STB Exterior: MSP front lip & rear spoiler; Matt V headlights; AutoExe grill; EDM tails Interior: JVC AVX-77; Autometer gauges; DaveBs; B&M shifter Projects to come: Engine rebuild |
|
|
|
|
|
30-06-2011, 11:58 AM
|
#95 |
|
Senior Member

Join Date: Mar 2007
Location: Brisbane
Car: Red '93 3000GT / Black '08 Ninja 250R
Posts: 2,930
 |
Just did the catchup through the thread, looks like you're getting on a roll. Have to take a look in person on cruise day
__________________
Understeer is when you hit the wall with the front of the car and oversteer is when you hit the wall with the rear of the car. Horsepower is how fast you hit the wall, torque is how far you take the wall with you. '97 1.8L Hardtop '93 3.0L TT 3000GT |
|
|
|
|
26-07-2011, 10:58 PM
|
#96 |
|
SP20 Member!
|
Shiny radiator install
So I have been slowly putting my radiator together and I had some free time the weekend before last. While the whole process didn't hit any major snags along the way, it did seem to take a while to swap out the radiators out.
Anyway, as it is a like-for-like swap I will keep the descriptions short and just provide a photo story . Anyway without further ado, lets start with what the original radiator looked like: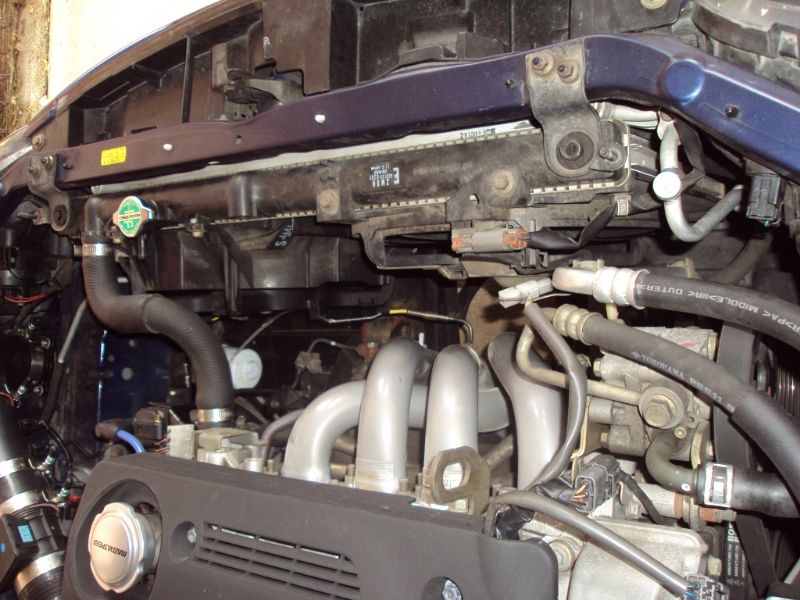 Now the original radiator is removed along with the coolant hoses: 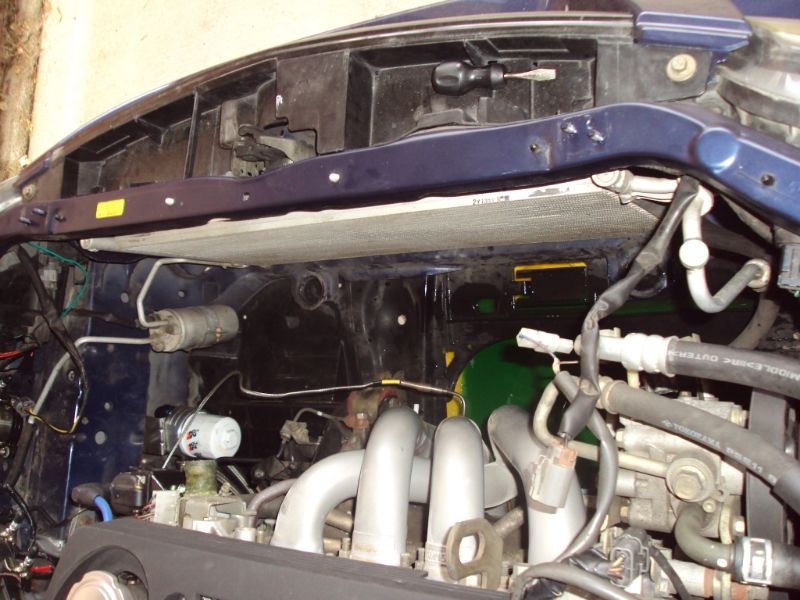 New radiator being placed in the car (special cameo appearance by Marc's hand ):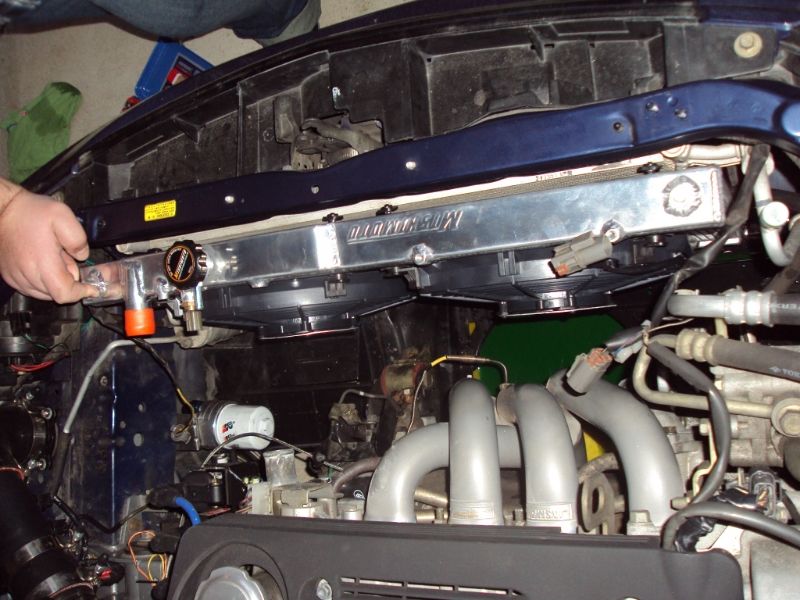 New radiator all hooked up: 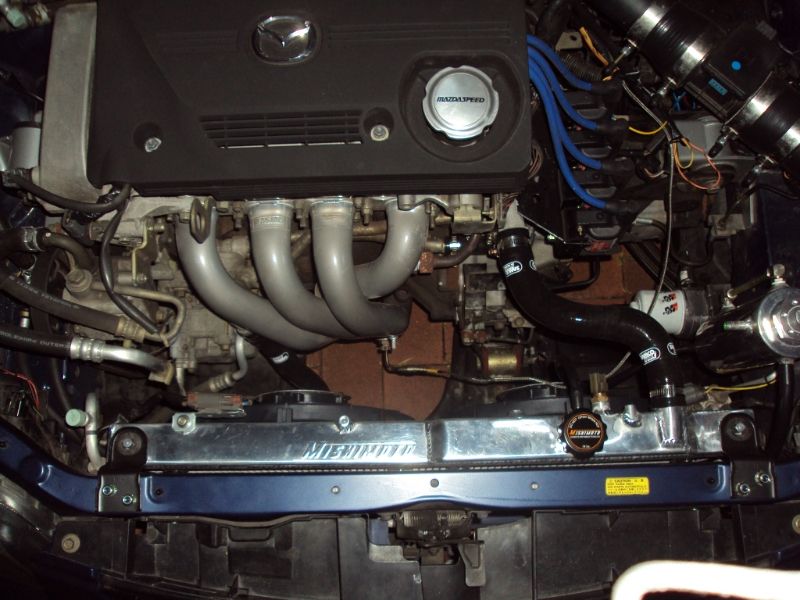 Along the way, I replaced all the coolant hoses with black Samco Sport hoses and new clamps. Also, cleaned up water neck and thermostat housing as they had crusty coolant crap on them. As part of regular maintenance I replaced the thermostat and put fresh coolant in. I also re-routed the line to the coolant overflow tank so that it connects at the bottom. This allows coolant expelled from the radiator due to expansion to be sucked back into the radiator when it cools down. It was a simple mistake not to have it hooked up this way from the start but the upgrade was a good excuse to correct it Can't wait to take it out on the cruise this weekend! P.S. Made a little bracket for the drivers side fan plug. Will make something similar for the passenger side soon
__________________
Exhaust: Autoexe headers; Custom midpipe; Racing Beat catback Engine: AWR mounts; Twiggy cams; Custom CAI; RR Racing UDP; Mishimoto rad EMS: Microtech LT-10; J&S Safeguard; Gearbox: MSP LSD; Fidanza flywheel; 5th gear Rims/Suspension: MX-5 rims; Tokico Illuminas; Eibach Pro-kit; Progress RSB; AutoExe STB Exterior: MSP front lip & rear spoiler; Matt V headlights; AutoExe grill; EDM tails Interior: JVC AVX-77; Autometer gauges; DaveBs; B&M shifter Projects to come: Engine rebuild Last edited by Orion; 10-08-2014 at 02:31 PM. |
|
|
|
|
26-07-2011, 11:09 PM
|
#97 |
|
HONEYWELL REPRESENT

Join Date: Aug 2005
Location: Salisbury - Inner City
Car: 1997 BA Hardtop - Had a 2003 BJii J48 Sport20, and 2x bg SOHC astina hatches
Posts: 5,011
|
lookin good man
__________________
|
|
|
|
|
26-07-2011, 11:11 PM
|
#98 |
|
Moderator
Join Date: Oct 2005
Location: Ipswich, Queensland
Car: 2002 Mazda Astina SP20 2006 Mazda 6 GY Wagon
Posts: 9,769
|
I have said it before, and I'll say it again, thats one sexy radiator
__________________
|
|
|
|
|
27-07-2011, 10:41 PM
|
#99 |
|
Senior Member
Join Date: Feb 2009
Location: sydney
Car: Mazda BJ SP20 Turbocharged
Posts: 629
|
noticed that your using slim aftermarket fans,
doesnt the mishimoto radiator that you put in allow the factory fans/shroud to be bolted up? |
|
|
|
|
27-07-2011, 11:01 PM
|
#100 | |
|
SP20 Member!
|
Quote:
Its just not what I wanted to do I got a fan controller as well (not installed yet) so I thought that new fans were in order too.
__________________
Exhaust: Autoexe headers; Custom midpipe; Racing Beat catback Engine: AWR mounts; Twiggy cams; Custom CAI; RR Racing UDP; Mishimoto rad EMS: Microtech LT-10; J&S Safeguard; Gearbox: MSP LSD; Fidanza flywheel; 5th gear Rims/Suspension: MX-5 rims; Tokico Illuminas; Eibach Pro-kit; Progress RSB; AutoExe STB Exterior: MSP front lip & rear spoiler; Matt V headlights; AutoExe grill; EDM tails Interior: JVC AVX-77; Autometer gauges; DaveBs; B&M shifter Projects to come: Engine rebuild |
|
|
|
|
|
| Thread Tools | |
| Display Modes | |
|
|


 Linear Mode

