|
|
 01-09-2011, 06:17 PM
|
#1 |
|
Senior Member
|
AzzA's SP20
Hey guys,
As some of you may know, recently Bought a 2001 SP20 and figured it was about time that i pulled my finger out and started my Build thread. Car History/ Details: Stock As A Rock!!!!! Was a one owner car, had log books up to 85000Km's and every receipt for servicing after that, including The 100,000 Km service... and new Engine and g/box mounts 2 weeks before i picked her up  Currently has 128000K's on the clock (already done 7000 ") ) )Mechaincally its a fantastic car, and only has a few minor flaws on the exterior, Such as 2 small dents the size of a 10cent piece, and the odd stone chip. Also the clear coat on the edge of the wing is just starting to blister. So far, I have Just been servicing the car, doing the Engine oil (only using royal purple), Gearbox oil (using Amsoil), Put new pads all round... Using Remsa Front Pads, Along with QFM HPX rear pads, and New DBA Front rotors. thanks to Greg at Gsl rally sport.....  My first Mod was some AGT stickers (extra 15Kw's) Followed be A.E's Old auto exe carbon fibre intake... which sounds amazing  Along with an auto exe Front grille. Along with an auto exe Front grille.Next Mod is already in progress... Have a Set of Mazda Speed MST-II's Being Shipped currently form japan (thanks to rupe).  Once they arrive wrap the new rims in some continental sport tyres. In the mean time i am going to paint the inserts of the headlights Black, along with tinting (slightly) the rear lights and the Fog lights.... also, some clear side indicators. The Future Mods List: Tokico Illumina Shocks H&R progressive Rate Springs Mazda speed Sway Bars (front and Read) AWR end links (front and rear) And hopefully if i can find one, an Auto exe 3point front strut brace Mazda Speed weighted Shift knob, with leather boot And a C's Short Shifter kit And then finally Its going to be stereo time Hope you all enjoy this build as much as me.. I will be sure to post up plenty of pics this weekend  Would love to hear your comments Cheers AzzA
__________________
Last edited by BG1.8sp; 01-09-2011 at 07:04 PM. |

|

|
| Sponsored Links |
|
|
|
01-09-2011, 06:53 PM
|
#2 |
|
SP20 Member!
|
Top colour!
__________________
 Exhaust: Autoexe headers; Custom midpipe; Racing Beat catback Engine: AWR mounts; Twiggy cams; Custom CAI; RR Racing UDP; Mishimoto rad EMS: Microtech LT-10; J&S Safeguard; Gearbox: MSP LSD; Fidanza flywheel; 5th gear Rims/Suspension: MX-5 rims; Tokico Illuminas; Eibach Pro-kit; Progress RSB; AutoExe STB Exterior: MSP front lip & rear spoiler; Matt V headlights; AutoExe grill; EDM tails Interior: JVC AVX-77; Autometer gauges; DaveBs; B&M shifter Projects to come: Engine rebuild |
|
|
|
|
01-09-2011, 06:56 PM
|
#3 |
|
Senior Member
|
Agreed, has to be the Nicest colour... followed by yellow... then Black
__________________
|
|
|
|
|
01-09-2011, 07:03 PM
|
#4 |
|
Senior Member
|
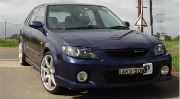
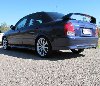
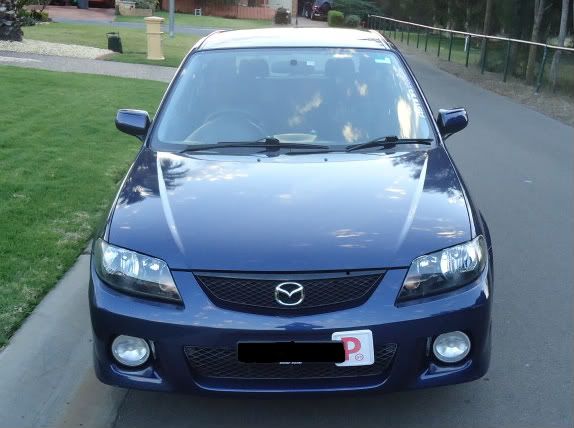
Here are just a couple of pics.
this was taken the weekend i got my car... just had a wash, clay bar, buff , polish and wax 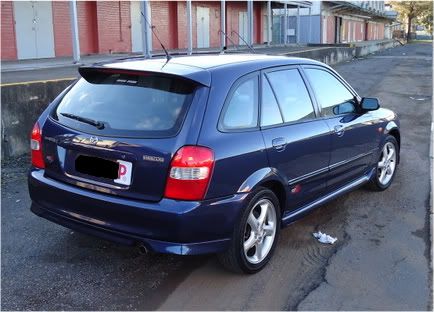 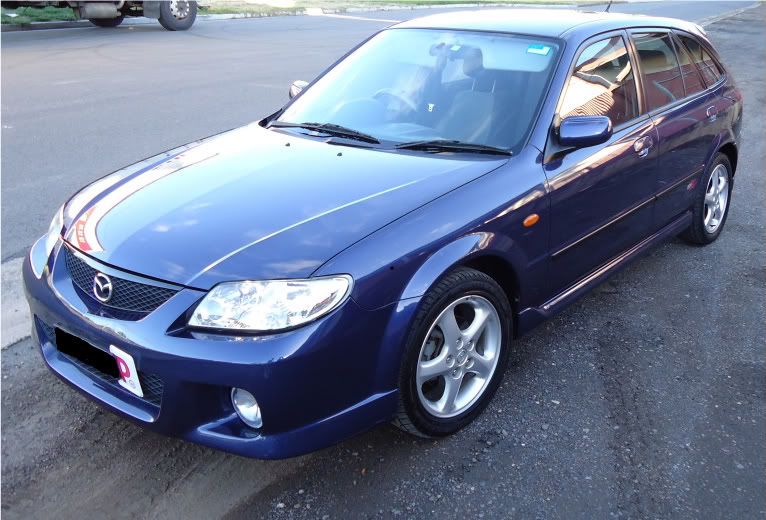
__________________
|
|
|
|
|
01-09-2011, 07:05 PM
|
#5 |
|
Junior Member
Join Date: Mar 2011
Location: Casula
Car: 2002 sp20
Posts: 104
|
Welcome to AGT mate, were you on the great western or woodvill road around 3:30-4ish today?
|
|
|
|
|
01-09-2011, 07:10 PM
|
#6 |
|
Senior Member
|
Hey, thanks, been on here for a while (had m BG before)
And Nah, that couldn't be me, i take James ruse to the M4 usually around 4pm I have an AGT sticker up high on my rear window (under the wing) and another one running up the side of my front windscreen
__________________
|
|
|
|
|
01-09-2011, 07:12 PM
|
#7 |
|
Senior Member
|
just a pic of the rims that are on their way

__________________
|
|
|
|
|
05-09-2011, 01:03 PM
|
#8 |
|
Senior Member
|
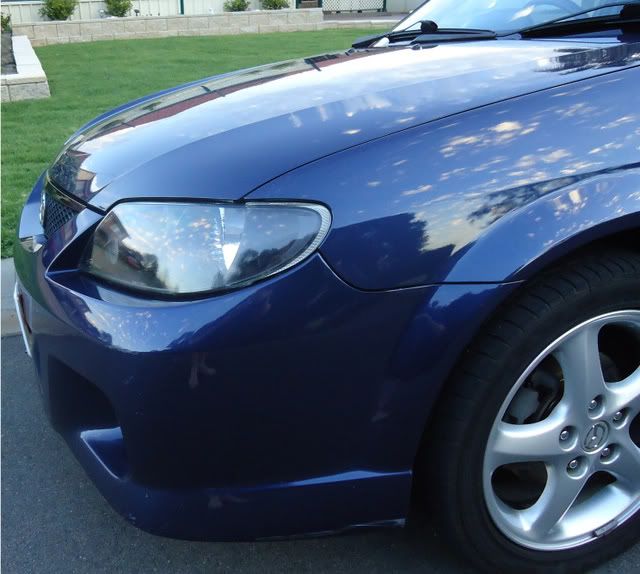
Pulled apart my headlights on Saturday morning... by Saturday afternoon, they were back in the car....
The black inserts look so much better that the chrome one's, especially on the dark blue... Now all i have to do is tint the driving lights to match... Will post up pics asap
__________________
|
|
|
|
|
05-09-2011, 06:56 PM
|
#9 |
|
Senior Member

Join Date: Jun 2011
Location: Sunshine Coast
Car: MPS
Posts: 1,939
|
Very nice! Keen to see some pictures!
|
|
|
|
|
06-09-2011, 06:16 PM
|
#10 |
|
Senior Member
|
Not really fantastic shots, kinda just snapped a couple in the remaining light.... will take plenty more decent shots on the cruise sunday night
__________________
|
|
|
|
|
06-09-2011, 06:18 PM
|
#11 |
|
Senior Member
|
only problem is... my lenses were going off and they wer turning a bit yellow, so sanded back with 1200 then buffed, then polished, look sweet,
but once i turned the lights on, realised that it might need to be cut back with 1800 and a bit more buffing.
__________________
|
|
|
|
|
06-09-2011, 06:32 PM
|
#12 |
|
Senior Member

|
looking good
lights hard to do ?
__________________
 To many of us, our cars are an extension of our own personalities, the way we choose to modify reflects this. |
|
|
|
|
06-09-2011, 06:37 PM
|
#13 |
|
Senior Member
|
nah, easy as pie...
Managed to pull the headlights off the car, separate them, prep for paint... eat lunch, paint them then re assemble and fit back into car in about 5 hours (including lunch) There are plenty of write ups on how to do it.. However, i did use a massive shortcut.... Instead of sanding back all of the chrome, putting it in primer, then sanding again and spraying the colour... I just hit it all with ESP... basically a primer for everything (can even paint glass with it) just apply, wipe off, then leave for an hour or so, and spray away
__________________
|
|
|
|
|
06-09-2011, 06:40 PM
|
#14 |
|
Senior Member
|
did you separate them by putting them in the oven the loosing them ?
__________________
To many of us, our cars are an extension of our own personalities, the way we choose to modify reflects this. |
|
|
|
|
06-09-2011, 06:50 PM
|
#15 |
|
Senior Member
|
yepp, used the oven, 50 degrees was a tad cold, so put it up to about 70 degrees for 5 or 10 minutes... goes nice and gooey then.
lift the tabs and pry off (used a butter knife) managed to move the lens off about 5mm the entire way around, then the sealant was cooling and getting hard again, so chucked it back in the oven for 5mins, then came of fairly easily. Just make sure that you take the tiny little Phillips head screw out... On the sp20 lights its on the corner of the outer edge (if that makes sense) And to re seal... DO NOT PUT MORE ADHESIVE ON!!! because when you push the two sections together, its just going to ooze out onto the inside of the lense... What i did was just re asseble lights, push together by hand as much as possible... in the oven (at 70 degrees) for 5 mins, then push the rest together.. should go fairly easily and allow to cool.
__________________
|
|
|
|
|
06-09-2011, 07:00 PM
|
#16 |
|
Senior Member
|
I am actually kinda considering doing them for members on here...
but just wondering on how much interest there would be??
__________________
|
|
|
|
|
10-10-2011, 08:00 PM
|
#17 |
|
Senior Member
|
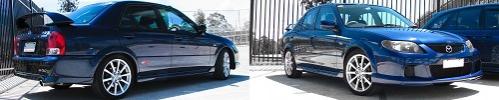
well, figured it was time for an update...
I finally have some decent shots of the car, ATM the only mods are black headlights, and a black autoexe grille. Still to come, My mazdaspeed Rims (should recieve them in a week or two, then probably painted and fitted within 6 to 8 weeks) Neways PICS!!!!!!!! 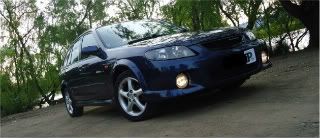  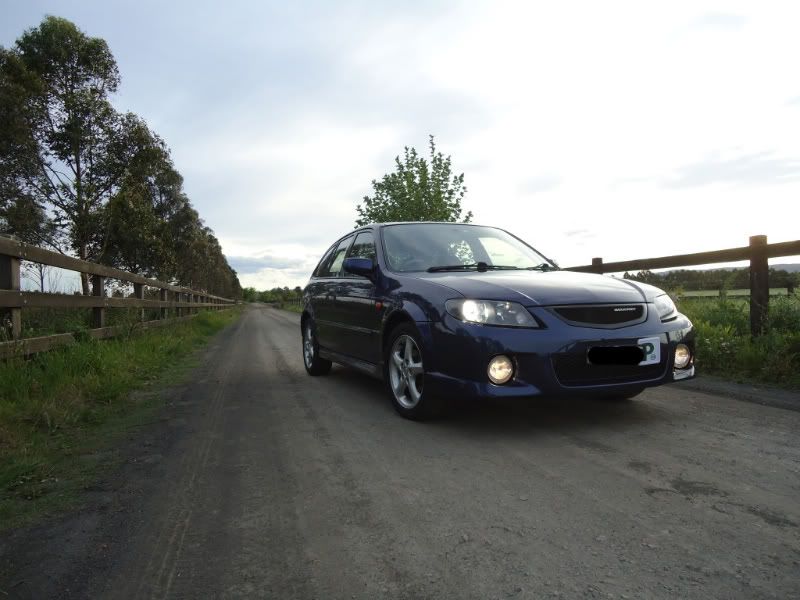 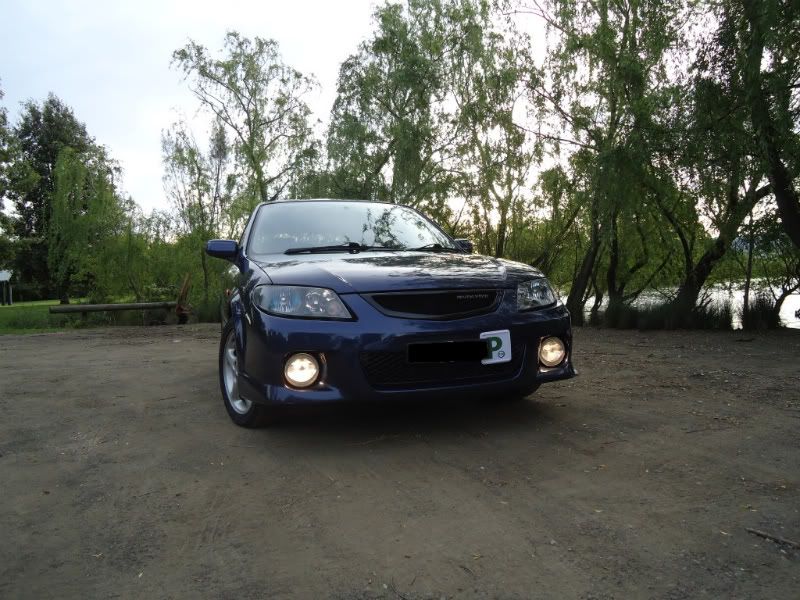 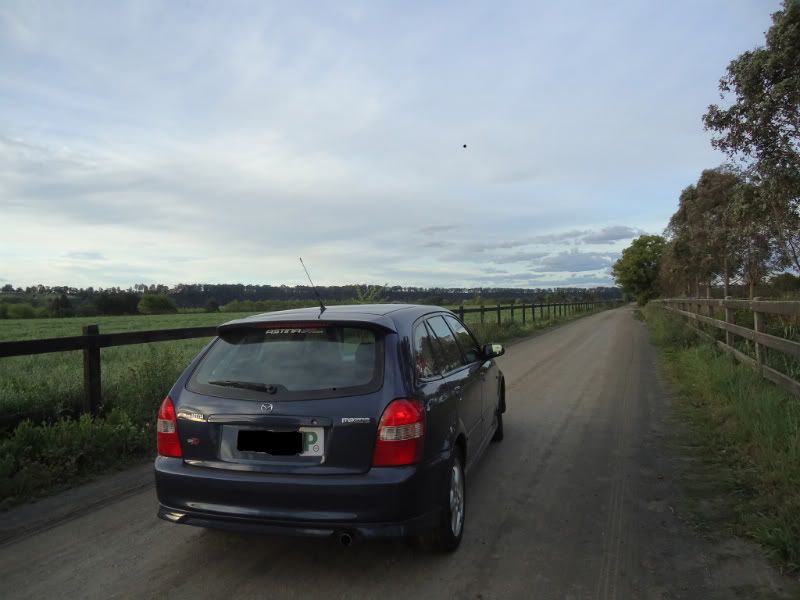 P.s.. Just got my Green P's this saturday..... Not long till the Boost!
__________________
|
|
|
|
|
10-10-2011, 08:02 PM
|
#18 |
|
Senior Member
|
Next mods to come (after rims) should be removing the black strips on doors and the sp20 stickers, as mine have faded pink and cracked.
Then smoking side indicators, and am working out something special for the rear lights.... lets hope that it is possible. also, tinting the driving lights too
__________________
|
|
|
|
|
24-10-2011, 04:44 PM
|
#19 |
|
Senior Member
|
well, finally got my rims, here are some teaser pics,
atm, the faces have scuff marks and a bit of gutter rash, Will all be fixed and painted once fitted with tyres on the car. Enjoy the pics: 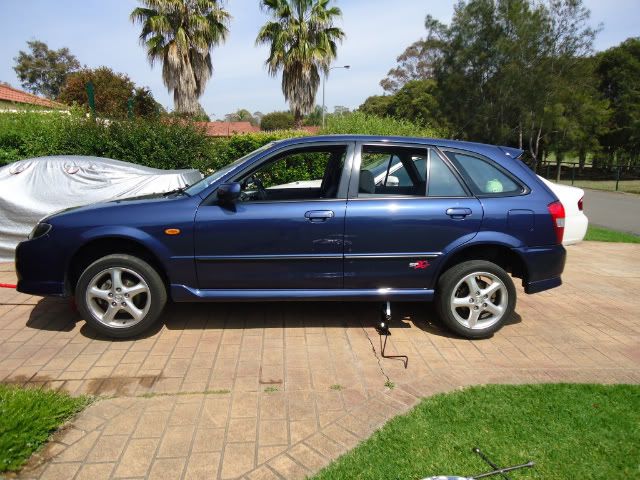 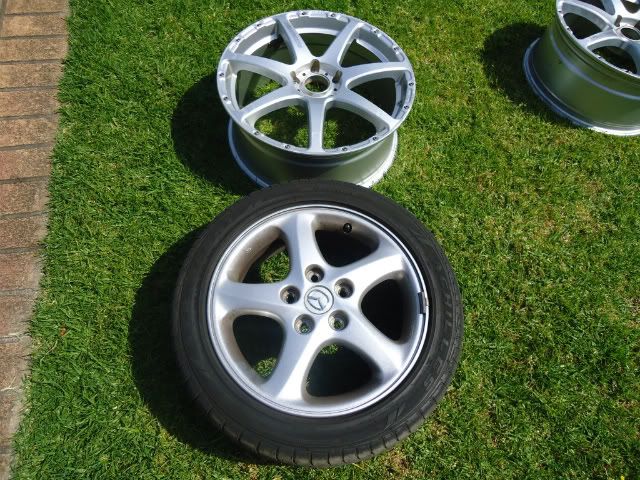 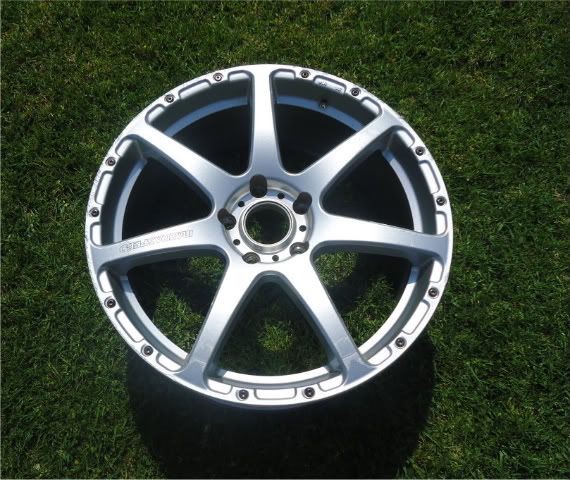 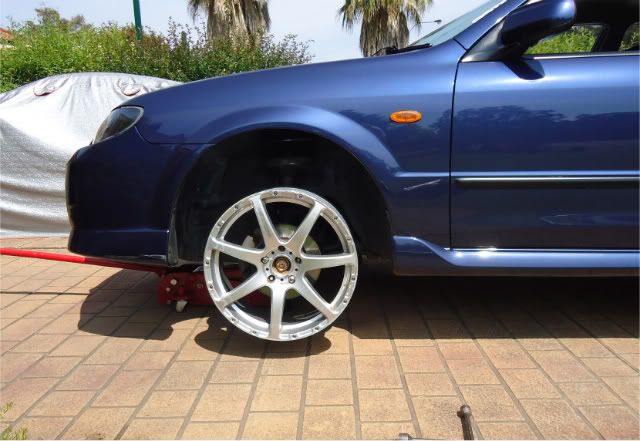 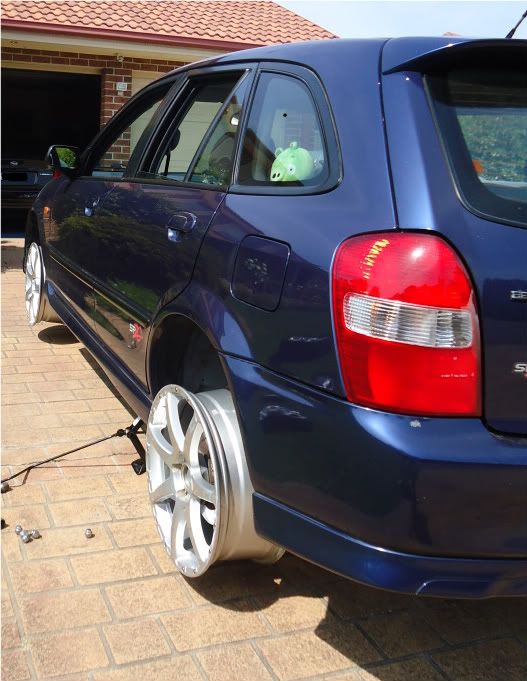 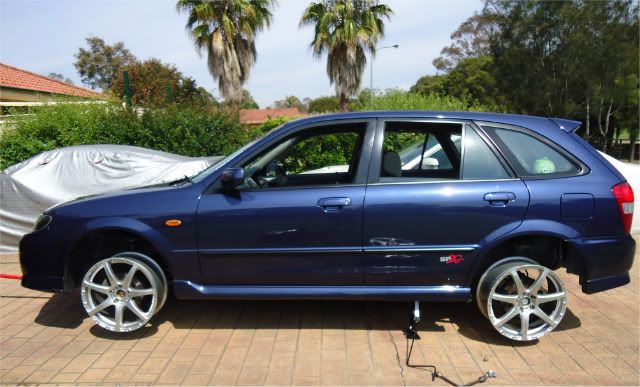
__________________
|
|
|
|
|
24-10-2011, 04:46 PM
|
#20 |
|
Administrator

Join Date: Mar 2002
Location: melb.vic.au
Car: AZ-1, Astina Hardtop Turbo, BJ Protege, Beetle
Posts: 16,525
|
The MST-II should look pretty good! Changing color, or staying silver?
__________________
jdmparts.rupewrecht.com Sourcing your not-quite-overnight parts from Japan WRECHT--|--SLOWTEGE--|--BEETLE--|--SUBSTITUTE--|--AZ-1 |
|
|
|
 |
|
|


 Linear Mode

